

制作模板
在本教程的前三章中,您学习了如何在Typst中编写文档、应用基本样式,以及深入自定义其外观以符合出版社的样式规范。因为你在上一章写的论文取得了巨大的成功,所以你被要求为同一个会议写一篇后续文章。这一次,您希望使用在上一章中创建的样式,并将其转换为可复用的模板。在本章中,您将学习如何为您和您的团队创建只需一个Show规则即可使用的模板。让我们开始吧! [⚠️]
Reusing data with variables
In the past chapters, most of the content of the document was entered by hand. In the third chapter, we used the document element and context to cut down on repetition and only enter the title once. But in practice, there may be many more things that occur multiple times in your document. There are multiple good reasons to just define these repeated values once:
- It makes changing them later easier
- It allows you to quickly find all instances where you used something
- It makes it easy to be consistent throughout
- For long or hard-to-enter repeated segments, a shorter variable name is often more convenient to type
If you were using a conventional word processor, you might resort to using a placeholder value that you can later search for. In Typst, however, you can instead use variables to safely store content and reuse it across your whole document through a variable name.
The technique of using context to reproduce an element’s property we have learned earlier is not always the most appropriate for this: Typst’s built-in elements focus on semantic properties like the title and description of a document, or things that directly relate to typesetting, like the text size.
For our example, we want to take a look at Typst’s pronunciation. One of the best ways to transcribe pronunciation is the International Phonetic Alphabet (IPA). But because it uses characters not found on common keyboards, typing IPA repeatedly can become cumbersome. So let’s instead define a variable that we can reference multiple times.
#let ipa = [taɪpst]Here, we use a new keyword, let, to indicate a variable definition. Then, we put the name of our variable, in this case, ipa. Finally, we type an equals sign and the value of our variable. It is enclosed in square brackets because it is content, mirroring how you would call a function accepting content. In other words, this syntax mirrors the phrase “Let the variable ipa have the value [taɪpst].”
Now, we can use the variable in our document:
#let ipa = [taɪpst]
The canonical way to
pronounce Typst is #ipa.
#table(
columns: (1fr, 1fr),
[Name], [Typst],
[Pronunciation], ipa,
)
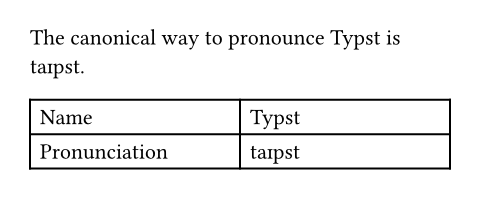
In the example, you can see that the variable can be used both in markup (prefixed with a #) and in a function call (by just typing its name). Of course, we can change the value of the variable and all its occurrences will automatically change with it. Let’s make it a bit clearer what is IPA and what is normal prose by rendering IPA in italics. We are also using slashes which, by convention, often enclose IPA.
#let ipa = text(
style: "italic",
)[/taɪpst/]
The canonical way to
pronounce Typst is #ipa.
#table(
columns: (1fr, 1fr),
[Name], [Typst],
[Pronunciation], ipa,
)
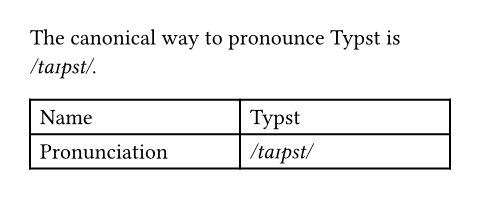
Here, we called the text function and assigned its return value to the variable. When you call a function, it processes its arguments and then yields another value (often content). So far in this tutorial, we called most functions directly in markup, like this: #text(fill: red)[CRIMSON!]. This call to the text function returns the red text as a return value. Because we placed it in markup, its return value just immediately got inserted into the content we wrote. With variables, we can instead store it to use it later or compose it with other values.
Variables are not limited to storing content: they can store any data type Typst knows about. Throughout this tutorial, you made use of many data types when you passed them to Typst’s built-in functions. Here is an example assigning each of them to a variable:
// Content with markup inside
#let blind-text = [_Lorem ipsum_ dolor sit amet]

// Unformatted strings
#let funny-font = "MS Comic Sans"

// Absolute lengths (see also pt, in, ...)
#let mile = 160934cm

// Lengths relative to the font size
#let double-space = 2em

// Ratios
#let progress = 80%

// Integer numbers
#let answer = 42

// Booleans
#let truth = false

// Horizontal and vertical alignment
#let focus = center
In this chapter of the tutorial, you will leverage variables and your own functions to build templates that can be reused across multiple documents.
玩具模板[⚠️]
在Typst中,模板是一个可以包装整个文档的函数。要学习如何做到这一点,让我们首先回顾一下如何编写自己的函数。函数可以做任何你想让他们做的事情,所以为什么不做得疯狂一点呢? [⚠️]
#let amazed(term) = box[✨ #term ✨]
You are #amazed[beautiful]!

此函数采用单个参数term,并返回一个内容块,其中term被被一朵朵小火花包围着。我们还把整个东西放在一个box里,这样我们的term与它的火花就不会换行符分开。
Typst附带的许多函数都有可选的命名参数,我们的函数也可以实现这一点。让我们向函数添加一个参数,其选择文本的颜色。我们需要提供默认颜色,以防用户没有给出参数。 [⚠️💀]
#let amazed(term, color: blue) = {
text(color, box[✨ #term ✨])
}
You are #amazed[beautiful]!
I am #amazed(color: purple)[amazed]!

模板现在可以通过“所有内容”Show规则来使用,该Show规则将自定义函数应用于我们的整个文档。让我们使用我们的amazed函数来实现它。 [⚠️]
#show: amazed
I choose to focus on the good
in my life and let go of any
negative thoughts or beliefs.
In fact, I am amazing!
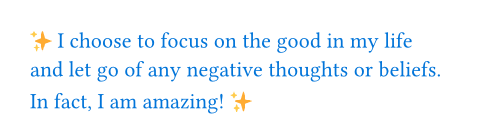
我们的整个文档现在将被传递给amazed函数,就好像我们把它包裹在amazed函数里面一样。这对于这个特定函数并不是特别有用,但是当Set规则和命名参数结合使用时,它可以非常强大。 [⚠️]
嵌入的Set和Show规则[⚠️]
要将一些Set和Show规则应用于我们的模板,我们可以在函数的内容块中使用set和show,然后将文档插入到该内容块中。 [⚠️]
#let template(doc) = [
#set text(font: "Inria Serif")
#show "something cool": [Typst]
#doc
]
#show: template
I am learning something cool today.
It's going great so far!
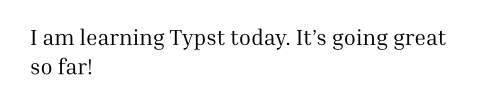
就像我们在上一章中已经发现的那样,Set 规则将应用于其内容块中的所有内容。 由于 “所有内容” Show 规则将我们的整个文档传递给 template 函数, 因此模板中的 text Set 规则和字符串 Show 规则将应用于整个文档。 让我们利用这些知识来创建一个模板,以复现我们在上一章中编写的论文的正文风格。 [⚠️]
#let conf(title, doc) = {
set page(
paper: "us-letter",
header: align(
right + horizon,
title
),
columns: 2,
...
)
set par(justify: true)
set text(
font: "Libertinus Serif",
size: 11pt,
)
// Heading show rules.
...
doc
}
#show: doc => conf(
[Paper title],
doc,
)
= Introduction
...
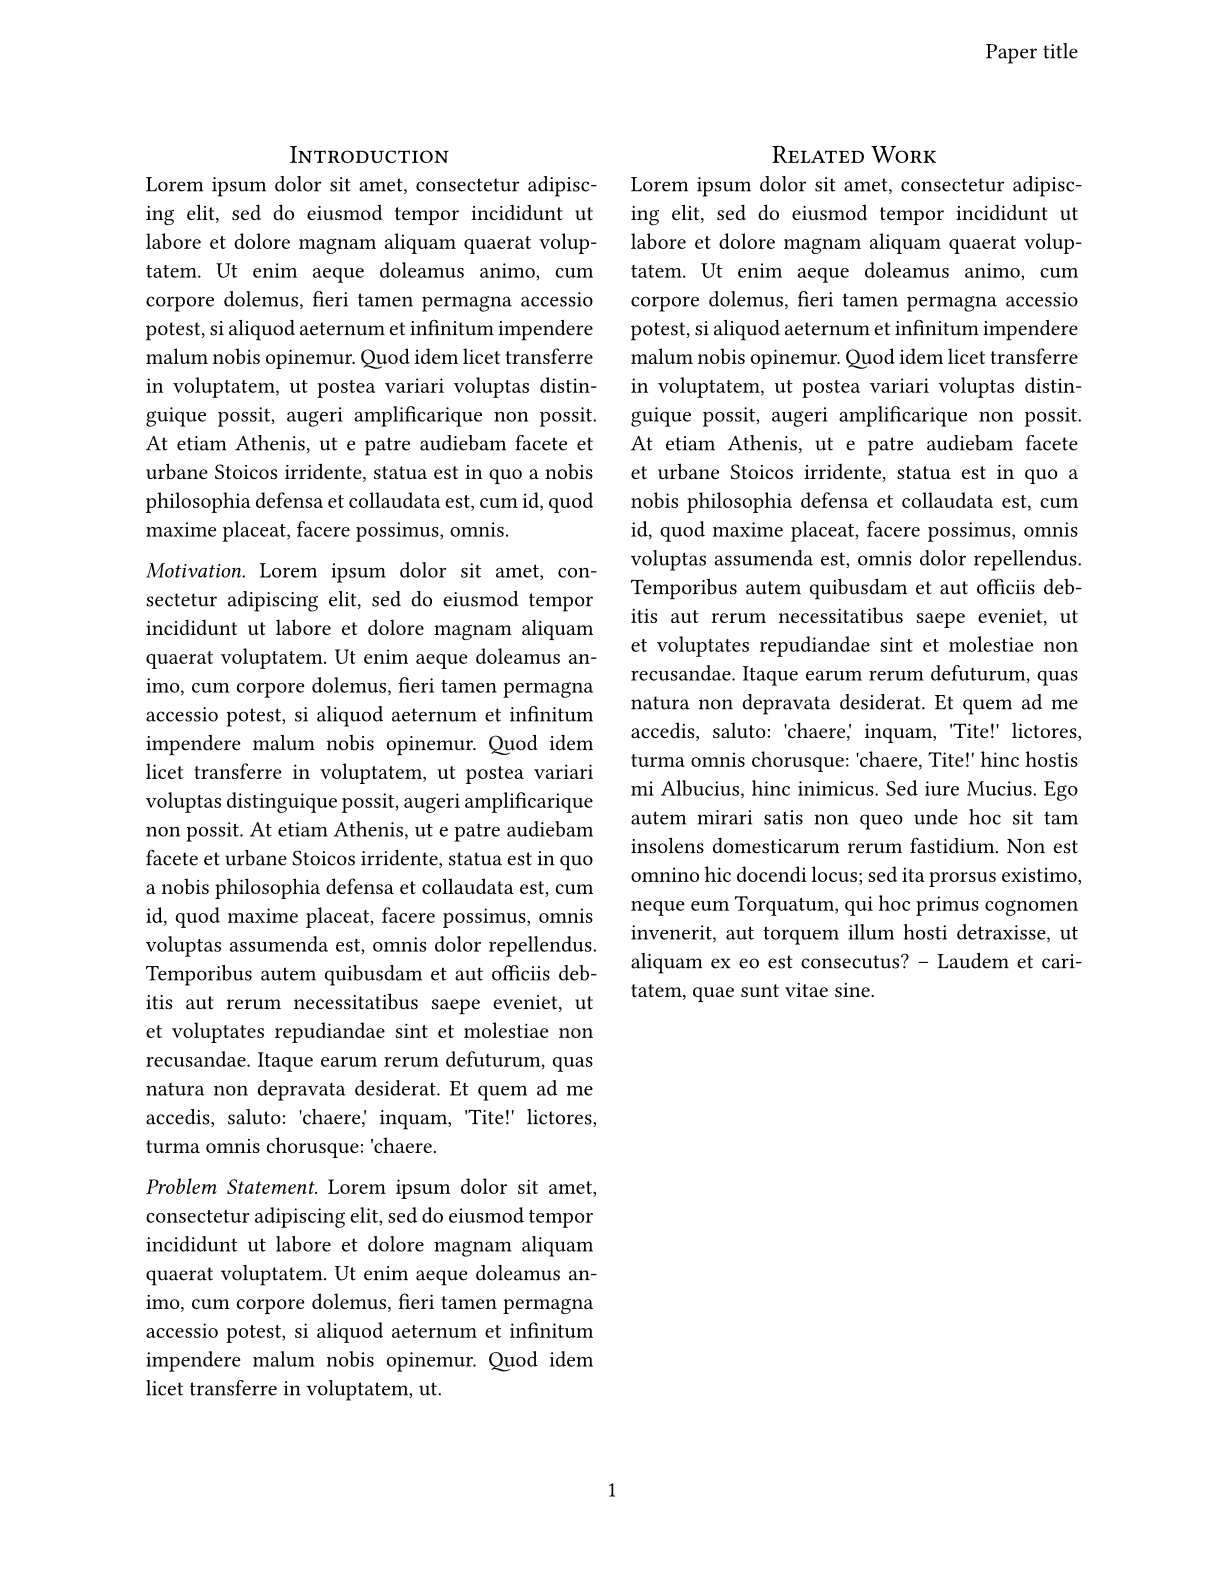
我们复制粘贴了上一章中的大部分代码。唯一的两个区别是,我们将所有内容都包装在函数conf中,并直接在doc参数上调用columns函数,因为doc对应着整个文档的内容。此外,我们使用大括号代码块而不是内容块。这样,我们就不需要为所有的Set规则和函数调用加上#前缀。与之相对的,我们也不再能再直接在里面写标记文本了。
还要注意标题的来源:我们以前把它放在变量中,而现在我们将其作为模板函数的第一个参数接收。因此,我们必须在调用模板的Show规则中指定它。 [⚠️💀]
具有命名参数的模板[⚠️]
我们在上一章的论文有一个标题和一个作者列表,让我们将这些内容添加到我们的模板中。除了标题之外,我们还希望我们的模板接受作者及其单位构成的列表,以及一个论文摘要。为了保持可读性,我们将添加这些参数作为命名参数。最后,我们希望它像这样工作: [⚠️]
#set document(title: [
  A Fluid Dynamic Model for
  Glacier Flow
])

#show: doc => conf(
  authors: (
    (
      name: "Theresa Tungsten",
      affiliation: "Artos Institute",
      email: "tung@artos.edu",
    ),
    (
      name: "Eugene Deklan",
      affiliation: "Honduras State",
      email: "e.deklan@hstate.hn",
    ),
  ),
  abstract: lorem(80),
  doc,
)

...让我们构建这个新的模板函数。首先,我们为title参数添加一个默认值。这样,我们可以在不指定标题的情况下调用模板。我们还添加了具有空默认值的命名参数authors和abstract。接下来,我们将上一章中生成标题、摘要和作者列表的代码复制到模板中,并用参数替换其中的固定值。
新的authors参数接收一个由字典的数组,其中带有键name、affiliation和email。因为我们可以输入任意数量的作者,所以我们需要动态地确定作者列表是需要一列、两列还是三列。首先,我们在authors数组上使用.len()方法确定作者的数量。然后,我们将列数设置为作者数量和3之间的最小值,以便我们永远不会创建超过三个列。如果作者超过三个,则将插入一个新行。为此,我们还在grid函数中添加了一个row-gending参数。否则,这些行将会靠得太近。为了从字典中提取有关作者的详细信息,我们使用字段访问语法。
我们仍然必须为每个作者对应的网格提供一个参数:这就是数组的map方法派上用场的地方。它将一个函数作为参数,该函数与数组的每个项一起调用。我们给它传递一个函数,该函数会格式化每个作者的详细信息,并返回一个包含内容值的新数组。现在,我们有一个值数组,我们希望将其用作网格的多个参数。我们可以通过使用spread操作符来做到这一点。它接受一个数组,并将其数组里的每个项目作为单独的参数应用于函数中。
生成的模板函数如下所示: [⚠️]
#let conf(
  authors: (),
  abstract: [],
  doc,
) = {
  // Set and show rules from before.
  // ...

  place(
    top + center,
    float: true,
    scope: "parent",
    clearance: 2em,
    {
      title()

      let count = authors.len()
      let ncols = calc.min(count, 3)
      grid(
        columns: (1fr,) * ncols,
        row-gutter: 24pt,
        ..authors.map(author => [
          #author.name \
          #author.affiliation \
          #link("mailto:" + author.email)
        ]),
      )

      par(justify: false)[
        *Abstract* \
        #abstract
      ]

    }
  )

  doc
}单独的模板文件[⚠️]
大多数情况下,模板应该在不同的文件中定义,然后导入到文档中。这样,您编写的主文件就可以保持整洁,并且您的模板可以轻松地复用。在文件面板中通过单击加号按钮创建一个新的文本文件,并将其命名为conf.typ。将conf函数定义移到该新文件内。现在,您可以通过在显示规则之前进行导入来从主文件访问它。在import关键字和冒号之间指定文件的路径,然后指明你要导入的函数。 [⚠️]
Another thing that you can do to make applying templates just a bit more elegant is to use the .with method on functions to pre-populate all the named arguments. This way, you can avoid spelling out a closure and appending the content argument at the bottom of your template list. Templates on Typst Universe are designed to work with this style of function call.
#import "conf.typ": conf
#set document(title: [
A Fluid Dynamic Model for
Glacier Flow
])
#show: conf.with(
authors: (
(
name: "Theresa Tungsten",
affiliation: "Artos Institute",
email: "tung@artos.edu",
),
(
name: "Eugene Deklan",
affiliation: "Honduras State",
email: "e.deklan@hstate.hn",
),
),
abstract: lorem(80),
)
= Introduction
#lorem(90)
== Motivation
#lorem(140)
== Problem Statement
#lorem(50)
= Related Work
#lorem(200)
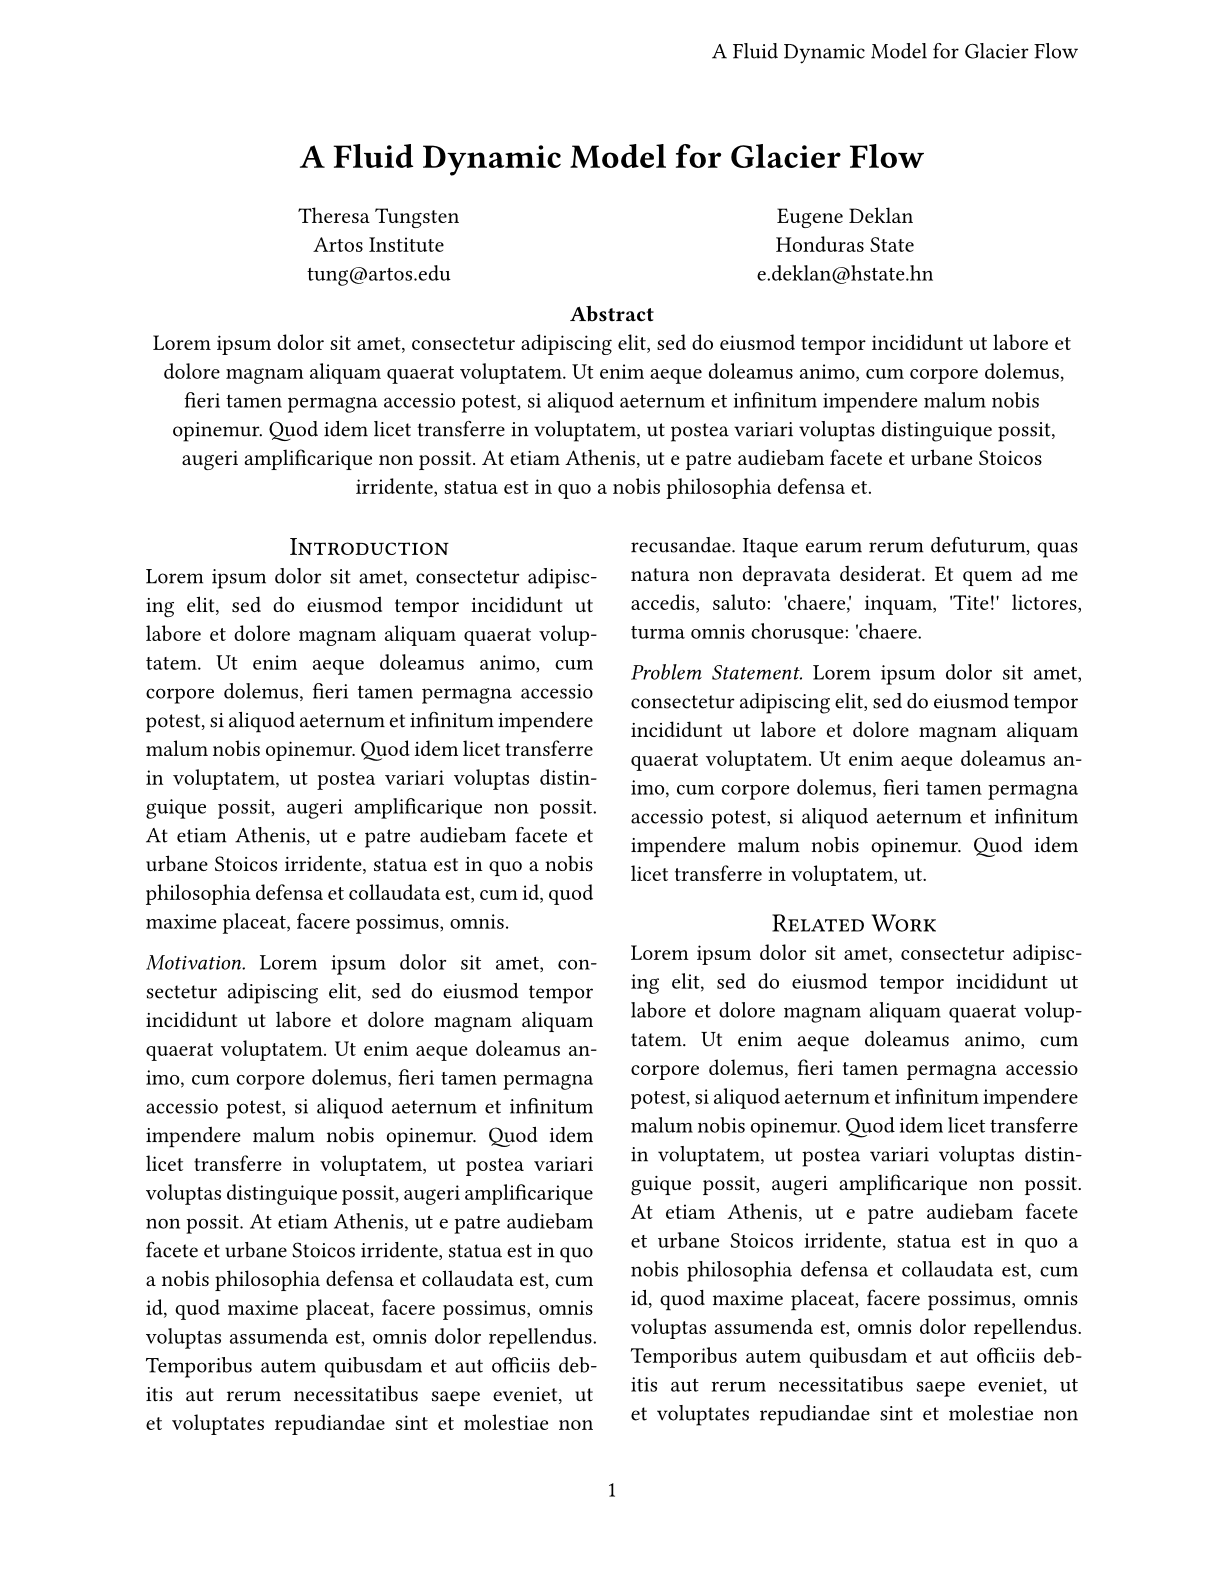
我们现在已经成功将会议论文转换为该会议的可重复使用模板!快来Typst的Discord服务器分享它,以便其他人也可以使用它吧! [⚠️]
总结
恭喜,您已完成Typst的教程!在本节中,您学习了如何定义自己的函数,以及如何创建和应用这个定义了可复用文档样式的模板。你已经走了很远,学到了很多东西。您现在可以使用Typst编写自己的文档并与他人共享。
我们仍然是一个非常年轻的项目,正在寻求您的反馈。如果您有任何问题,建议或发现错误,请在Typst的Discord服务器,我们的contactform或社交媒体上告诉我们。
那还在等什么呢?快注册一个账户并写点有趣的东西吧! [⚠️]