
高级样式
在本教程的前两章中,您学习了如何在Typst中编写文档以及如何更改其格式。你在这两章写的报告得到了极佳的评价,你的导师想以此为基础写一篇会议论文!当然,这篇报告必须遵循会议的论文样式规范。让我们看看应该如何实现这一目标。
在开始之前,请先让我们创建一个团队,邀请您的导师并让他们加入到团队中。您可以通过回到App的Dashboard(编辑器左上角的四圈图标)来进行这个操作。然后,选择左侧工具栏中的加号图标并创建一个团队。最后,单击新团队并通过单击团队名称旁边的“管理团队”转到其设置。现在,您可以通过电子邮件邀请您的导师了。 [⚠️]
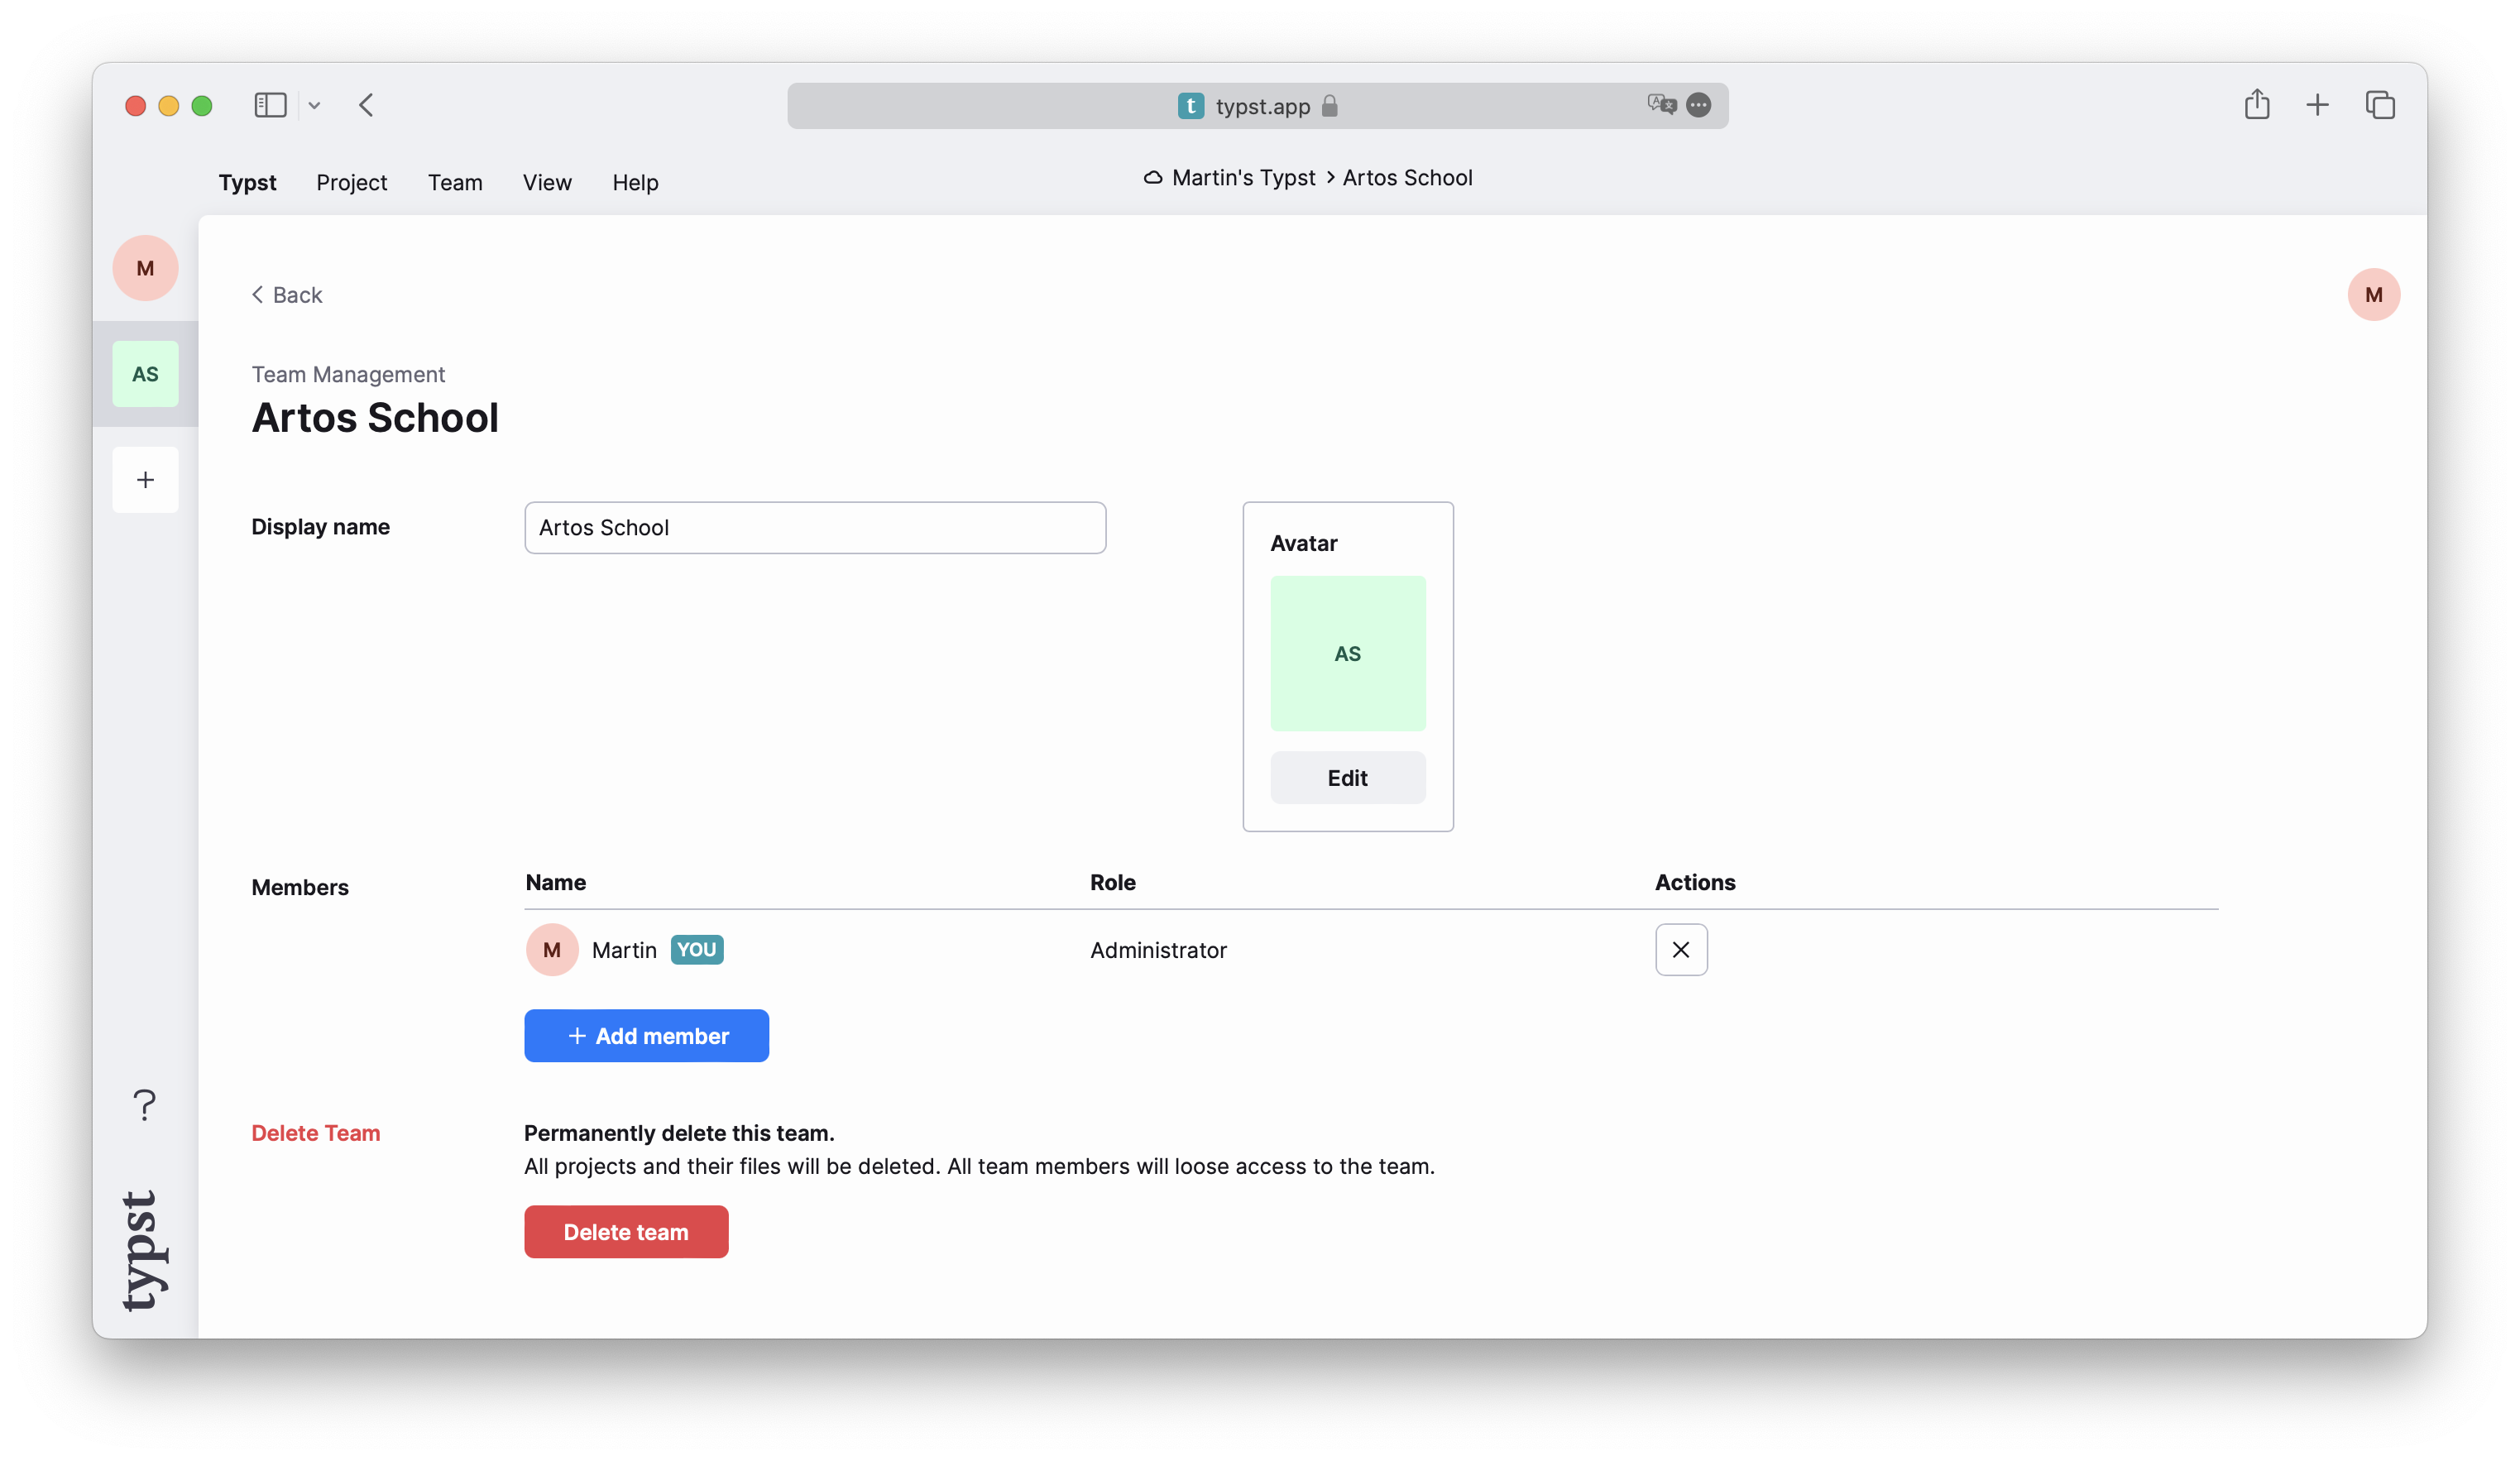
接下来,将您的项目移动到团队中:打开项目,通过选择左侧工具栏中的齿轮图标,并从所有者列表中选择您的新团队。不要忘记保存您的更改!
现在,您的导师也可以编辑项目,并且你们都可以实时查看更改。您可以加入我们的Discord server查找具有预览访问权限的其他人,并与他们一起尝试团队功能! [⚠️]
会议规范[⚠️]
会议布局规范可在会议网站上找到。让我们来看一下:
- 字体应为11pt的衬线字体
- 标题应为17pt的粗体
- 论文包含单栏摘要和两栏正文
- 摘要应居中
- 正文应对齐
- 第一级章节标题应为13pt,居中并以小写字母呈现
- 二级标题是短标题,斜体,与正文文本具有相同的大小
- 最后,页面尺寸应为US letter,编号在页脚的中心,每页的左上角应包含论文的标题
这些要求的大部分我们已经知道应该如何实现了,但对于其中的少部分内容,我们需要学习一些新的技巧。 [⚠️]
编写正确的Set规则[⚠️]
让我们从为文档编写一些Set规则开始。 [⚠️]
#set page(
paper: "us-letter",
header: align(right)[
A Fluid Dynamic Model for
Glacier Flow
],
numbering: "1",
)
#set par(justify: true)
#set text(
font: "Libertinus Serif",
size: 11pt,
)
#lorem(600)
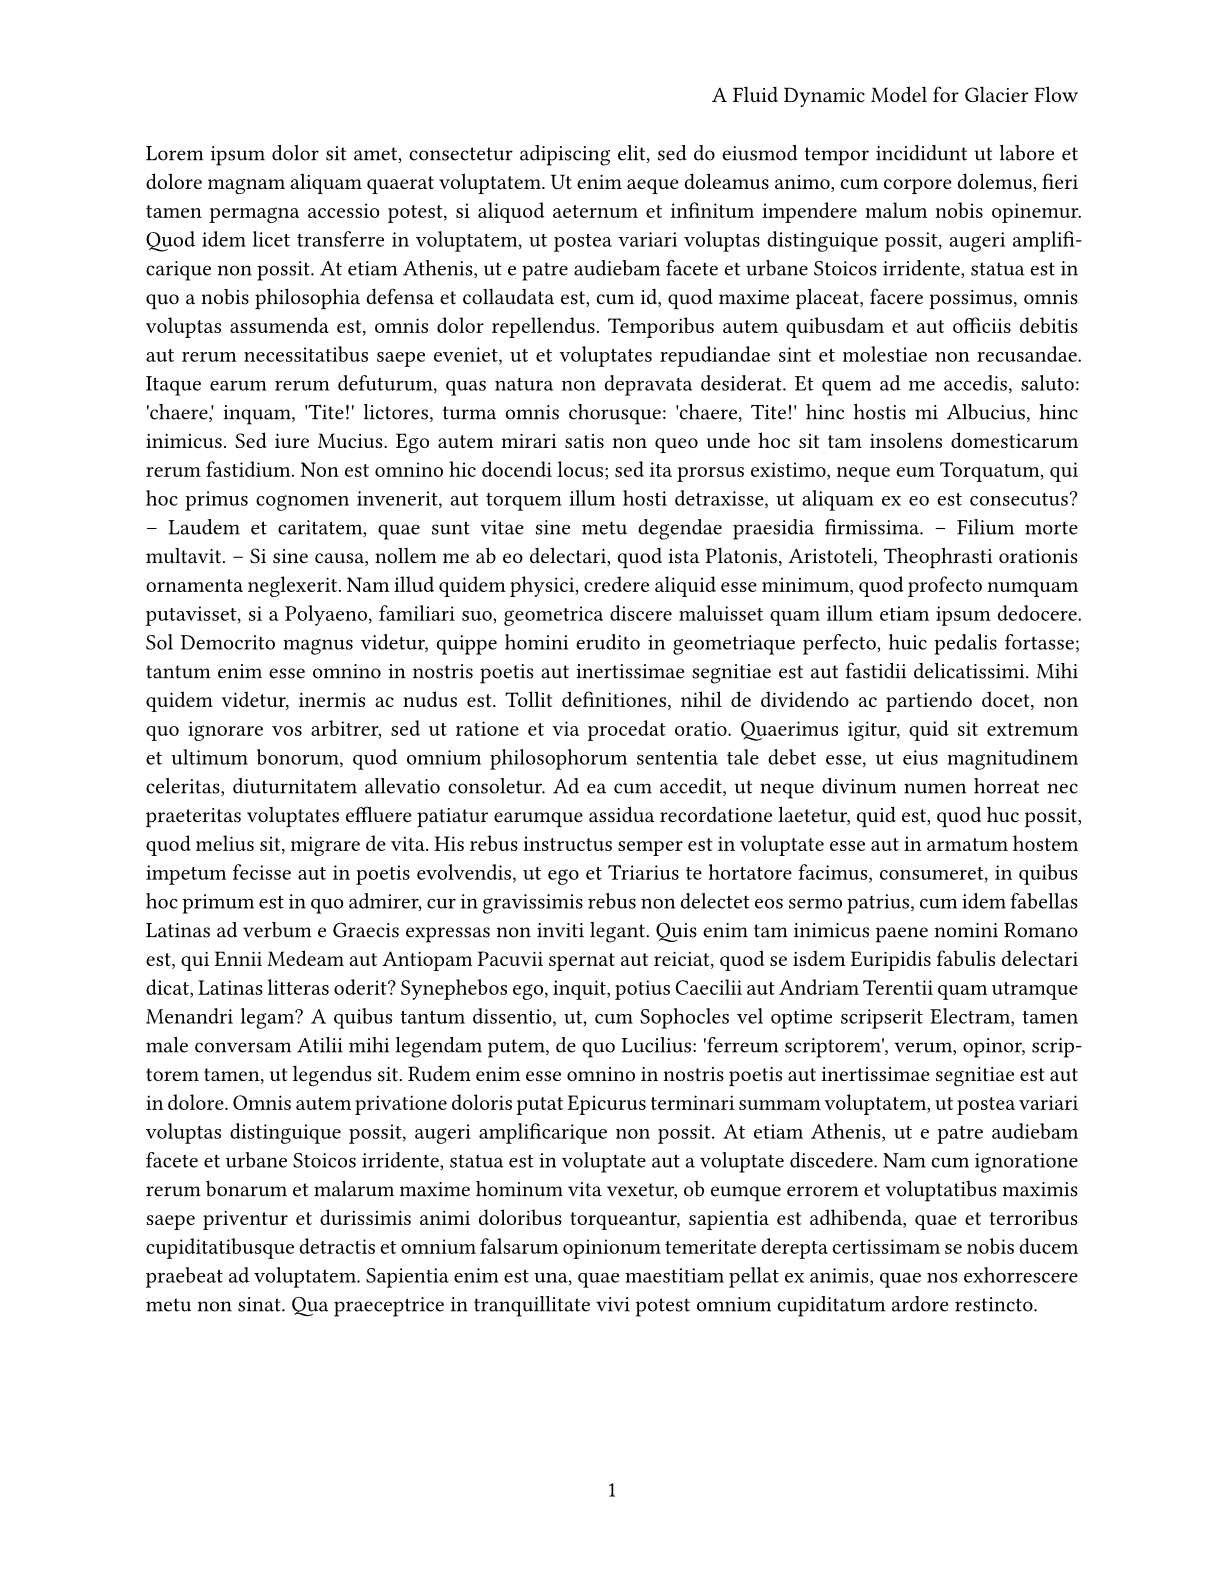
你对这里的大部分内容已经很熟悉了。我们将文本大小设置为11pt,将字体设置为Linux Libertine。我们还启用了段落对齐,并将页面尺寸设置为US letter。
header参数是新出现的:有了它,我们可以使用填入的内容块来填充每个页面的上边距。在标题中,我们根据会议样式规范的要求将其指定为论文的标题。我们使用align函数将文本向右对齐。
最后还有numbering参数。在这里,我们可以提供一个numbering pattern来定义如何对页面进行编号。通过设置为"1",Typst仅显示最简单的页码。将其设置为"(1/1)"将显示当前页面和用括号括起来的页总数。我们甚至可以在这里提供一个完全自定义的函数来实现我们喜欢的内容显示方式。 [⚠️💀]
创建标题和摘要[⚠️]
现在,让我们添加标题和摘要,我们将从标题开始。我们将其居中对齐,并通过将其括在*星号*中以将其加粗。 [⚠️💀]
#title[
A Fluid Dynamic Model
for Glacier Flow
]

You can see that the title is already boldfaced and has some space around it. However, it is left-aligned and not exactly 17pt large. Hence, we need to adjust its appearance. The title function does not come with any arguments for font or text size we could set. Instead, these properties are defined on the text and align functions.
What is the difference between what the title function inserted and the headings we produced with equals signs?
Headings, even first-level headings, can appear multiple times in your document whereas a title only appears once, usually at the beginning. Differentiating between the two helps Typst make your document accessible for users of Assistive Technology such as screen readers.
When we want to customize the properties of some element inside of another kind of element, we can use show-set rules. First, we use show to select which element we want to customize. We call this a selector. Then, we type a colon. Next, we write the set rule that should apply to elements matching the selector. Summarized, the syntax looks like this:
#show your-selector: set some-element(/* ... */)Let’s recall: We want to center-align the title and make it 17pt large. Hence, we need two show-set rules:
- One with the selector
titleand the ruleset text(size: 17pt) - One with the selector
titleand the ruleset align(center)
Our example now looks like this:
#show title: set text(size: 17pt)
#show title: set align(center)
#title[
A Fluid Dynamic Model
for Glacier Flow
]
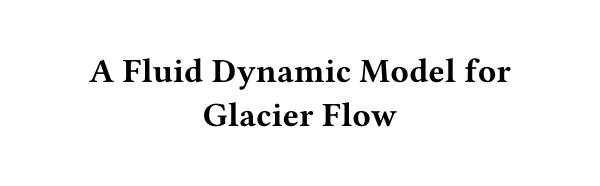
这看起来是正确的。我们使用text函数以覆盖掉之前对text应用的Set规则,将text函数参数中的size增加到17pt。让我们同时添加作者列表:由于我们是与我们的导师一起撰写这篇论文的,我们将添加我们自己和他们的名字。 [⚠️]
#grid(
columns: (1fr, 1fr),
align(center)[
Therese Tungsten \
Artos Institute \
#link("mailto:tung@artos.edu")
],
align(center)[
Dr. John Doe \
Artos Institute \
#link("mailto:doe@artos.edu")
]
)
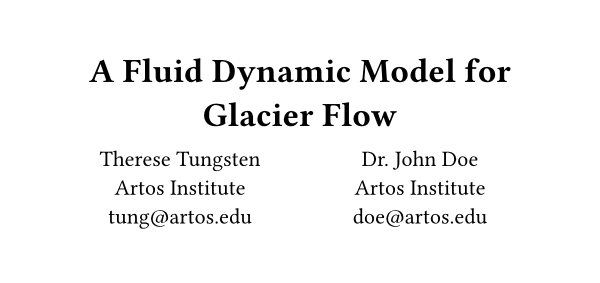
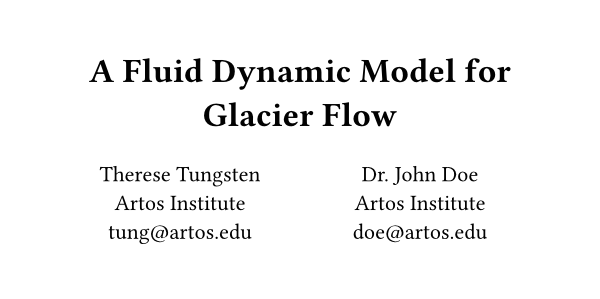
两个作者块彼此相邻,我们使用grid函数来创建这种布局。使用grid,我们可以准确控制每列的大小以及哪些内容放到哪个单元格。columns参数接受relativelengths或fractions的数组。在本例中,我们向它传递了两个相等的fractions,告诉它将可用空间分成两个相等大小的列。然后,我们将两个内容块参数传递给grid函数。第一个是我们自己的信息,第二个是我们的导师的信息。我们再次使用align函数将列内的内容居中。网格采用任意数量的内容块参数来指定单元格。行是自动添加的,但也可以使用rows参数手动调整它们的大小。 [⚠️💀]
#show title: set text(size: 17pt)
#show title: set align(center)
#show title: set block(below: 1.2em)
#title[
A Fluid Dynamic Model
for Glacier Flow
]
#grid(
// ...
)
现在,让我们添加加入。请记住,会议希望摘要居中,且左右不对齐。 [⚠️💀]
...
#align(center)[
#set par(justify: false)
*Abstract* \
#lorem(80)
]
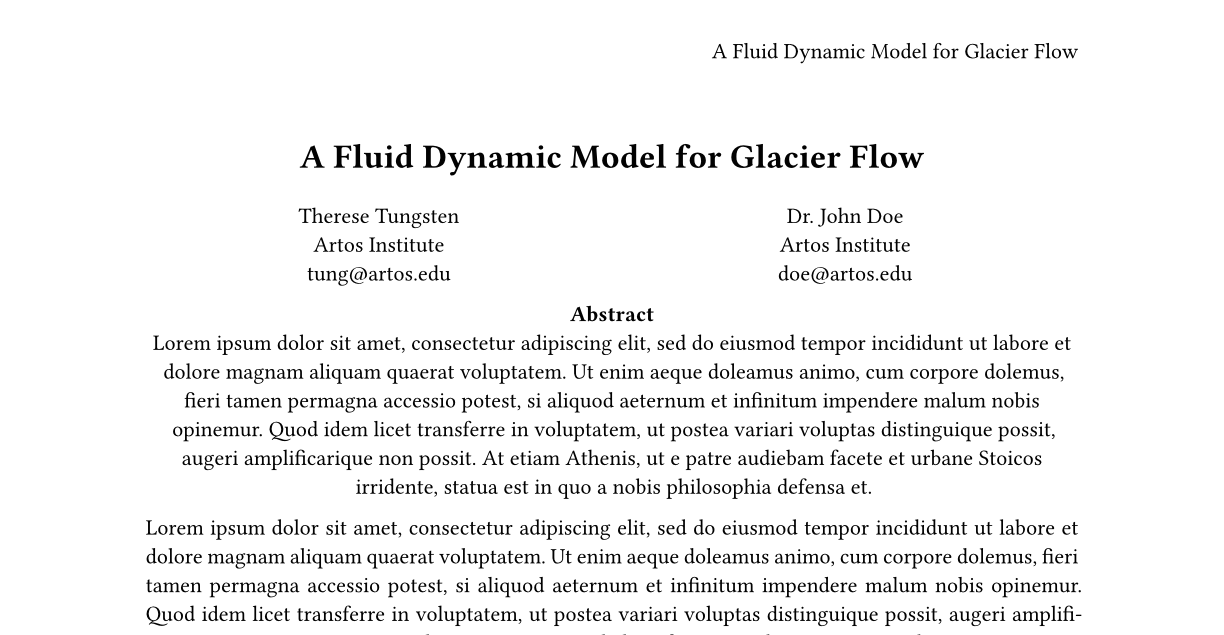
干的漂亮!值得注意的是,我们在align的内容参数中使用了一个新的Set规则来禁用摘要的对齐。即便它是在第一个Set规则之后指定的,这也不会影响文档的其余部分。这是因为内容块拥有局部作用域样式。内容块中设置的任何规则只会影响该内容块中的内容。
另一个调整可以是将论文标题保存在一个变量中,这样我们就不必多次输入标题。我们可以使用let关键字来做到这一点: [⚠️💀]
#set document(title: [A Fluid Dynamic Model for Glacier Flow])When exporting a PDF, the title set here will appear in the title bar of your PDF reader. Your operating system will also use this title to make the file retrievable with search. Last but not least, it contributes to making your document more accessible and is required if you choose to comply with PDF/UA, a PDF standard focused on accessibility.
Now, we need a way to retrieve the value we set in the main title and the header. Because the title function is designed to work together with the document element, calling it with no arguments will just print the title. For the header, we will need to be more explicit: Because Typst has no way of knowing that we want to insert the title there, we will need to tell it to do so manually.
Using context, we can retrieve the contents of any values we have set on elements before. When we use the context keyword, we can access any property of any element, including the document element’s title property. Its use looks like this:
#set document(title: [
A Fluid Dynamic Model
for Glacier Flow
])
...
#set page(
header: align(
right + horizon,
// Retrieve the document
// element's title property.
context document.title,
),
...
)
#title()
...
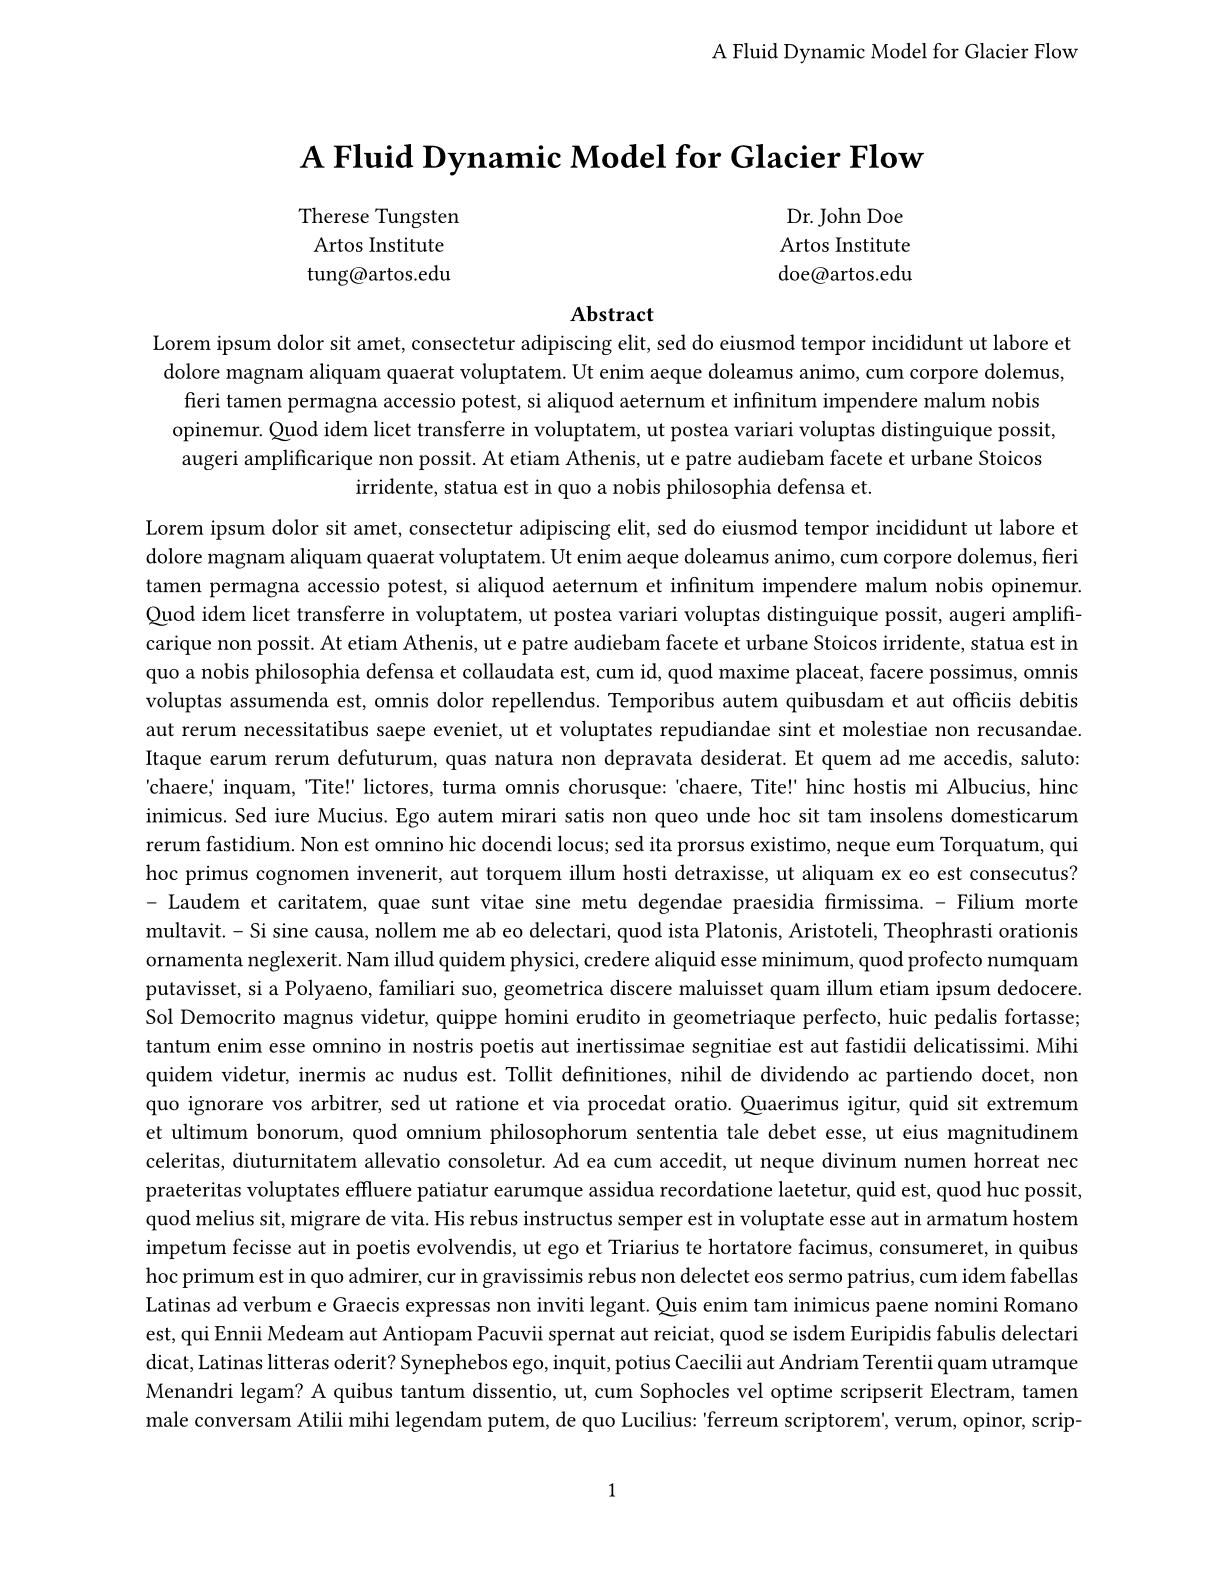
First, notice how we called the title function with empty, round parentheses. Because no argument was passed, it defaulted to what we set for the document element above. The distinction between empty round and empty square brackets is important: While empty round brackets show that you are passing nothing, empty square brackets mean that you are passing one argument: an empty content block. If called that way, the title would have no visible content.
Next, take a look at the header. Instead of the title in square parentheses, we used the context keyword to access the document title. This inserted exactly what we set above. The role of context is not limited to accessing properties: With it, you can check if some elements are present in the document, measure the physical dimensions of others, and more. Using context, you can build powerful templates that react to the preferences of the end-user.
 Why is the context keyword required to access element properties?
Normally, when we access a variable, we know exactly what its value is going to be:
- The variable could be a constant built into Typst, like
#sym.pi - The variable could be defined by an argument
- The variable could be defined or overwritten in the current scope
However, sometimes, that’s not enough. In this chapter of the tutorial, we have inserted a page header with the title. Even though we pass only one piece of content for the header, we may want different pages to have different headers. For example, we may want to print the chapter name or use the page number. When we use context, we can write a single context block that tells Typst to take a look at where it’s inserted, look for the last heading, the current page number, or anything else, and go from there. That means that the same context block, inserted on different pages, can produce different output.
For more information, read up on context in its docs after completing this tutorial.
添加列和标题[⚠️]
不幸的是,上面的论文看起来像一堵铅墙。 为了解决这个问题,让我们添加一些标题,并将我们的论文切换到双列布局。 columns 函数接受一个整数参数和一个内容参数,并将内容布局到指定数量的列中。 由于我们希望摘要之后的所有内容都在两列中,因此我们需要将 columns 函数应用于整个文档。
并不需要将整个文档包装在一个巨大的函数调用里,我们可以使用 “所有内容” Show 规则。 要编写这样的 show 规则,请在 show 关键字后面直接放置一个冒号,然后提供一个函数,该函数将文档的其余部分作为参数输入。 我们在这里将参数称为 rest,但您可以自由选择任何参数名。 然后,该函数可以对该内容执行任何操作。在我们的例子中,它将内容传递给 columns 函数。 [⚠️]
#place(
top + center,
rect(fill: black),
)
#lorem(30)
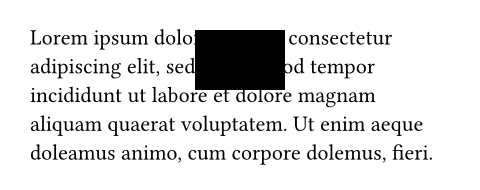
If we hadn’t used place here, the square would be in its own line, but here it overlaps the few lines of text following it. Likewise, that text acts as if there was no square. To change this behavior, we can pass the argument float: true to ensure that the space taken up by the placed item at the top or bottom of the page is not occupied by any other content.
#set page(
paper: "us-letter",
header: align(
right + horizon,
context document.title,
),
numbering: "1",
columns: 2,
)
#place(
top + center,
float: true,
scope: "parent",
clearance: 2em,
)[
...
#par(justify: false)[
*Abstract* \
#lorem(80)
]
]
= Introduction
#lorem(300)
= Related Work
#lorem(200)
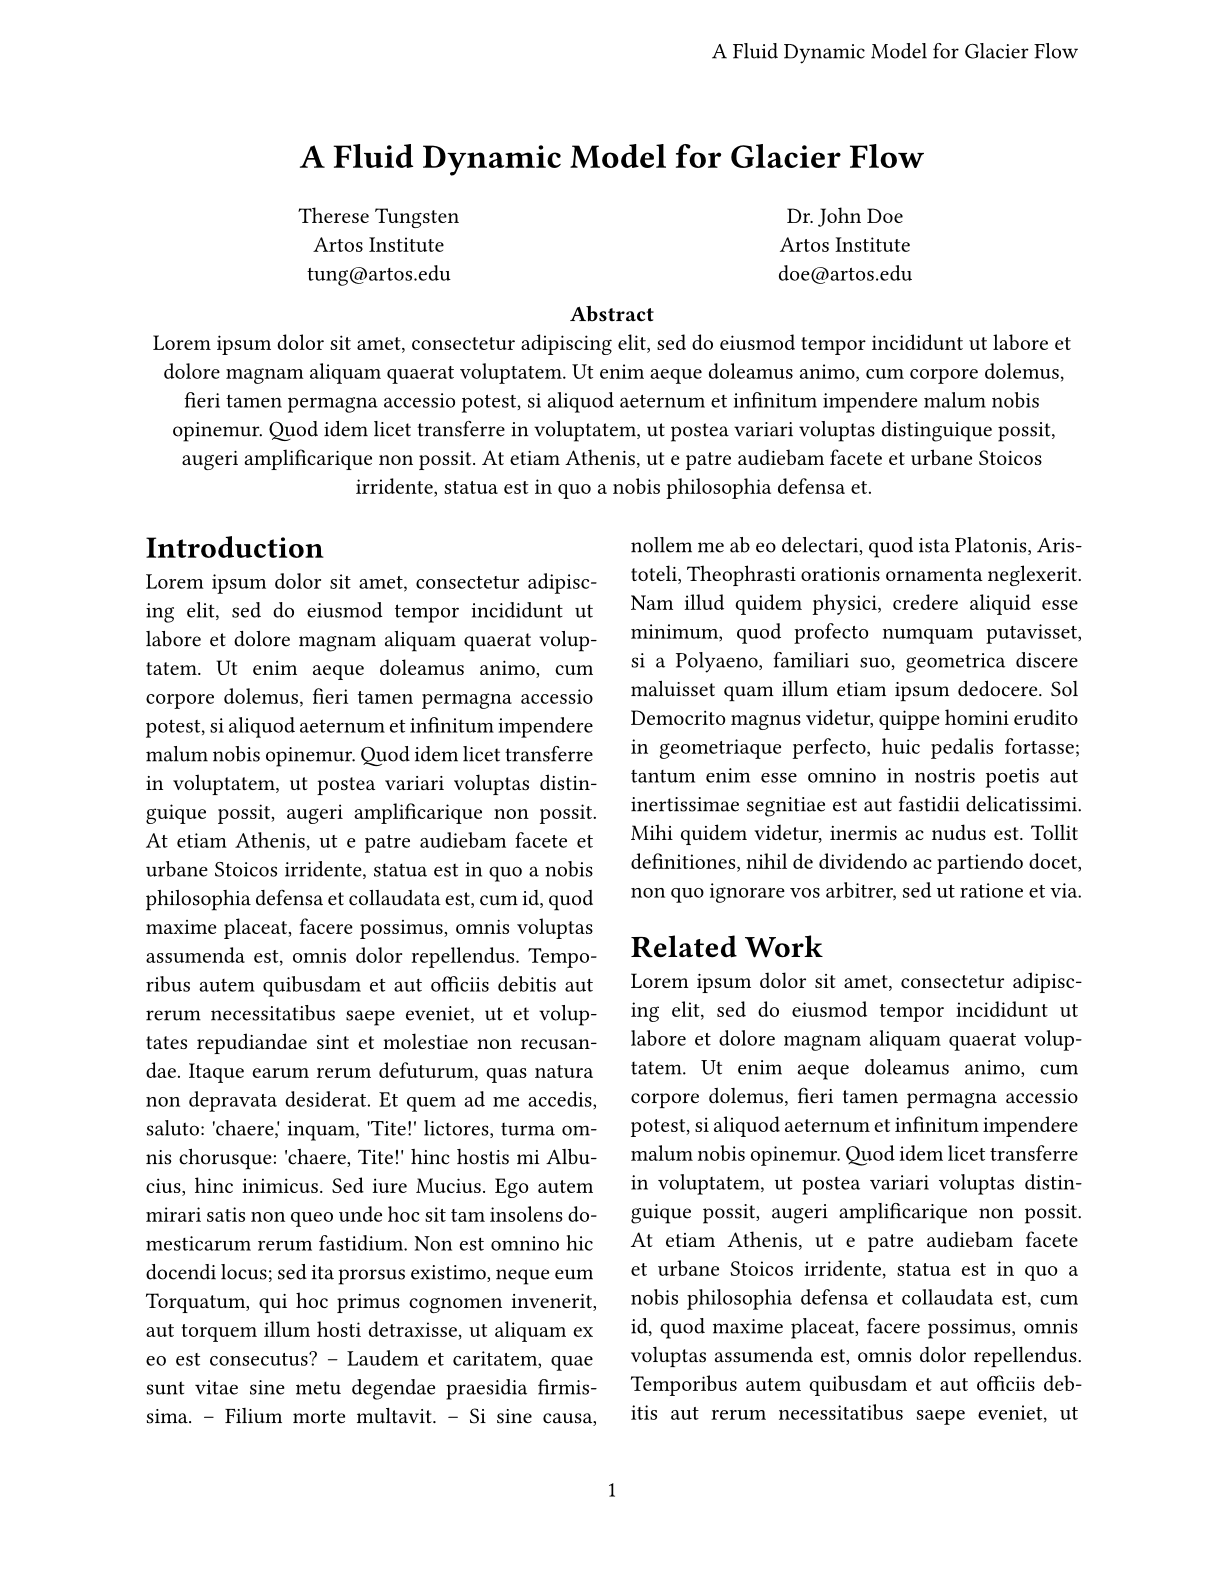
In this example, we also used the clearance argument of the place function to provide the space between it and the body instead of using the v function. We can also remove the explicit align(center, ..) calls around the various parts since they inherit the center alignment from the placement.
现在只剩下一件事要做了:设置标题样式。我们需要使它们居中并使用小标题。因为heading函数没有提供任何的方法来让我们完成这个任务,所以我们需要编写自己的标题Show规则。 [⚠️💀]
- A show-set rule to make headings center-aligned
- A show-set rule to make headings 13pt large and use the regular weight
- A show rule to wrap the headings in a call to the
smallcapsfunction
#show heading: set align(center)
#show heading: set text(
size: 13pt,
weight: "regular",
)
#show heading: smallcaps
...
= Introduction
...
== Motivation
...
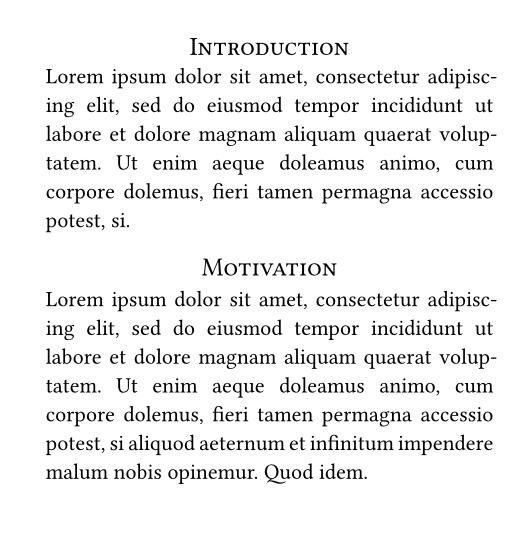
这看起来很棒!我们使用了适用于所有标题的Show规则。我们给了它一个函数,该函数将标题作为参数传递。该参数可以用作内容块,但它也有一些字段,如title、numbers和level,我们可以使用它们组成我们需要的自定义外观。在这里,我们应用居中对齐,并将字体粗细设置为"regular",因为标题默认为粗体,并使用smallcaps函数以小写字母的方式呈现标题。
唯一剩下的问题是,现在所有标题看起来都一模一样。“Motivation”和“Problem Statement”子小节应该是斜体标题,但现在,它们看起来与小节标题没有区别。我们可以通过在设置规则上使用where选择器来解决这个问题:这是一个method,我们可以标题(和其他元素)上调用,允许我们按level过滤它们。我们可以用它来区分小节和子小节标题: [⚠️]
#show heading.where(level: 1): set align(center)
#show heading.where(level: 1): set text(size: 13pt, weight: "regular")
#show heading.where(level: 1): smallcaps
#show heading.where(level: 2): set text(
size: 11pt,
weight: "regular",
style: "italic",
)
#show heading.where(level: 2): it => {
it.body + [.]
}
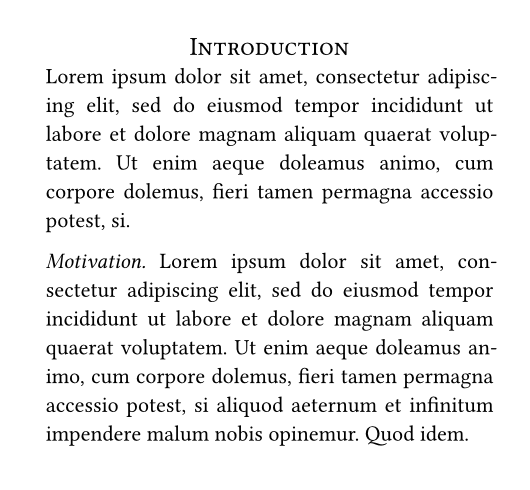
In this example, we first scope our previous rules to first-level headings by using .where(level: 1) to make the selector more specific. Then, we add a show-set rule for the second heading level. Finally, we need a show rule with a custom function: Headings enclose their contents with a block by default. This has the effect that the heading gets its own line. However, we want it to run into the text, so we need to provide our own show rule to get rid of this block.
We provide the rule with a function that takes the heading as a parameter. This parameter is conventionally called it, but can have another name. The parameter can be used as content and will just display the whole default heading. Alternatively, when we want to build our own heading instead, we can use its fields like body, numbering, and level to compose a custom look. Here, we are just printing the body of the heading with a trailing dot and leave out the block that the built-in show rule produces. Note that this heading will no longer react to set rules for heading numbering and similar because we did not explicitly use it.numbering in the show rule. If you are writing show rules like this and want the document to remain customizable, you will need to take these fields into account.
这看起来很棒!我们编写了两个显示规则,每个规则都有选择地应用于一级和二级标题。 我们使用 where 选择器按级别过滤标题。然后,我们将小节标题呈现为短标题。 我们还会自动在子小节标题的末尾添加一个点号。
让我们回顾一下会议的样式规范:
- 字体应为 11pt 衬线字体 ✓
- 标题应为 17pt 和粗体 ✓
- 论文包含单栏摘要和两列正文 ✓
- 摘要应居中 ✓
- 正文应对齐 ✓
- 第一级章节标题应居中,以小写字母和 13pt 呈现 ✓
- 二级标题是短标题, 斜体,大小与正文相同 ✓
- 最后,页面尺寸应为 US letter,编号在中心,每页的左上角应包含论文标题 ✓
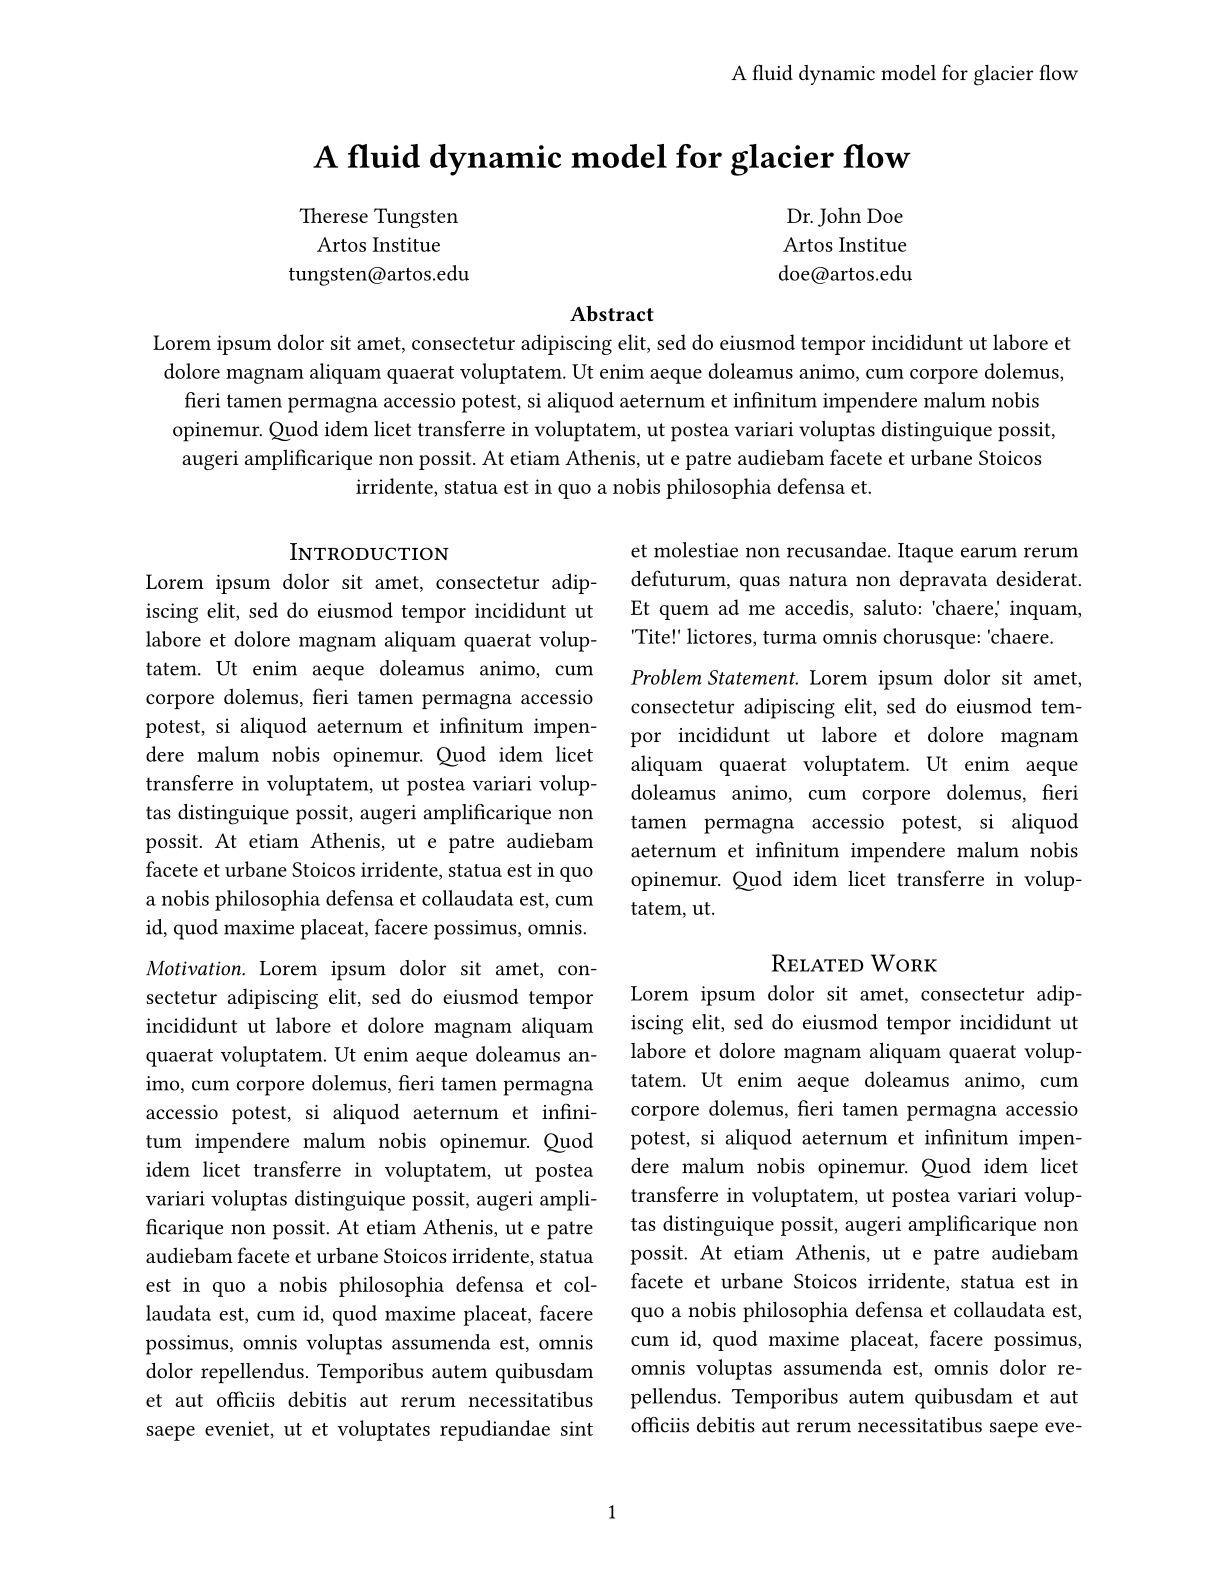
我们现在符合所有这些规范,可以向会议提交论文了!完成的论文如下所示: [⚠️]
小结
您现在已经学习了如何创建页眉和页脚,如何使用函数和作用域范围在本地覆盖样式,如何使用grid函数创建更复杂的布局,以及如何为单个函数和整个文档编写Show规则。您还学习了如何使用where选择器按级别过滤标题。
这篇论文取得了巨大的成功!你在会议上遇到了很多志同道合的研究人员,并计划了一个项目,你希望明年在同一地点发表。不过,您需要使用相同的样式规范撰写一篇新论文,所以也许现在您想为您和您的团队创建一个能够节省你们时间的模板?
在下一节中,我们将学习如何创建可在多个文档中复用的模板。这是一个更高级的主题,所以如果你现在觉得并没有必要了解,可以以后再学习。 [⚠️]